counted cross stitch instructions
Counted cross stitch is a timeless craft offering creative expression through X-shaped stitches. Perfect for all skill levels‚ it combines simplicity with artistic freedom‚ making it an ideal DIY project.
1.1 What is Counted Cross Stitch?
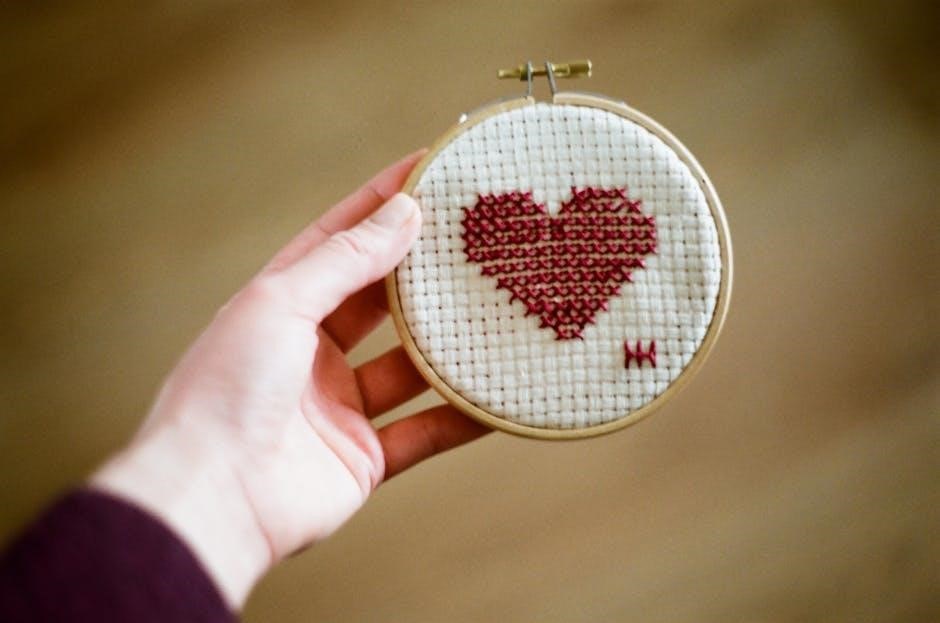
Counted cross stitch is a traditional form of embroidery using X-shaped stitches on fabric. It involves following a chart where each symbol represents a stitch. Simple and versatile‚ it suits all skill levels‚ offering endless creative possibilities for crafting unique designs with embroidery floss and thread.
1.2 Benefits of Learning Counted Cross Stitch
Learning counted cross stitch offers numerous benefits‚ including fostering creativity‚ relaxation‚ and fine motor skills. It provides a sense of accomplishment and is a portable hobby. Perfect for crafting gifts or home decor‚ it’s a skill that combines artistry with practicality‚ making it rewarding for crafters of all levels.
1.3 Why Cross Stitch is Perfect for Beginners
Cross stitch is ideal for beginners due to its simplicity and forgiving nature. Starter kits and tutorials make it easy to learn basic stitches. The structured patterns and repetitive motions build confidence‚ allowing new crafters to create beautiful designs with minimal tools and effort‚ making it an accessible hobby.
Essential Materials for Counted Cross Stitch
Gather Aida or evenweave fabric‚ embroidery floss‚ a tapestry needle‚ hoop‚ and scissors. These tools provide the foundation for bringing cross stitch patterns to life creatively.
2.1 Fabric Types: Aida vs. Evenweave
Aida fabric‚ with its visible squares‚ is ideal for beginners‚ while evenweave offers a smoother‚ more versatile surface. Both are popular for cross stitch‚ with Aida being easier for counting stitches and evenweave suitable for detailed designs. Choose based on project complexity and personal preference.
2.2 Embroidery Floss and Thread
Embroidery floss is the primary thread for cross stitch‚ available in vibrant colors. Typically used in 2-3 strands‚ it’s separated easily for stitching. The choice of strand count depends on fabric type and pattern requirements‚ ensuring optimal coverage and detail in your design.
2.3 Tools: Needles‚ Hoops‚ and Scissors
Essential tools include a tapestry needle with a blunt tip and large eye for threading. An embroidery hoop keeps fabric taut‚ available in various sizes. Scissors are needed for cutting embroidery floss‚ ideally sharp and dedicated to this task to maintain quality and prevent dulling from other uses.
Understanding the Pattern
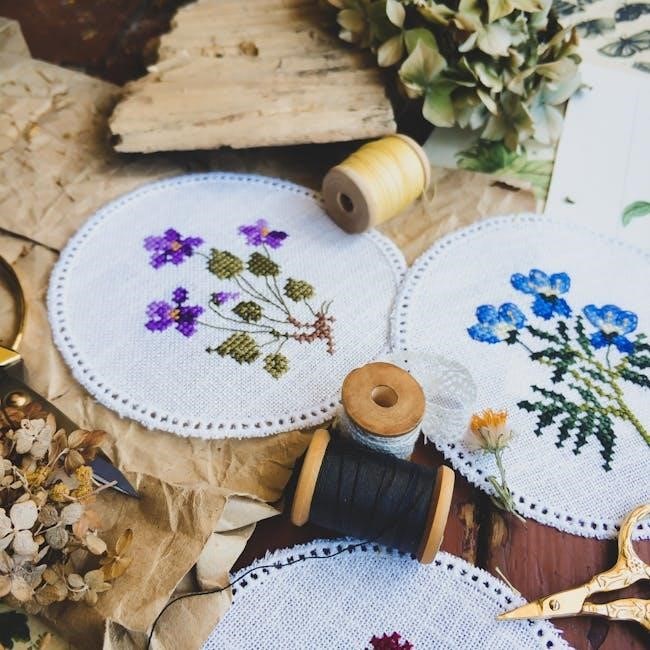
A cross stitch pattern is a visual guide showing stitch placement. Each square represents a stitch‚ with symbols or colors indicating thread shades. Reference lines help align stitches accurately for consistent results.
3.1 How to Read a Cross Stitch Chart
Reading a cross stitch chart involves understanding its grid system‚ where each square represents a stitch. Symbols or colors indicate specific thread shades‚ while reference lines help align stitches. Start by locating the center mark‚ then count squares to find your starting point. Double-checking ensures accurate stitch placement and alignment‚ leading to neat results.
3.2 Symbols‚ Colors‚ andTheir Meanings
3.2 Symbols‚ Colors‚ and Their Meanings
Symbols and colors on a cross stitch chart represent specific embroidery floss shades. Each symbol corresponds to a color‚ outlined in the chart’s legend. Understanding these codes ensures accurate stitching. Some charts use color blocks instead of symbols‚ while others combine both for clarity‚ helping you maintain consistency and precision in your design.
3.3 Choosing the Right Pattern for Your Skill Level
Selecting a pattern that matches your skill level is crucial. Beginners should opt for designs with fewer colors and larger symbols‚ while experienced stitchers can tackle complex patterns. Starting with the right project ensures a smooth‚ enjoyable stitching experience and builds confidence in your abilities over time.
Preparing Your Fabric
Preparing your fabric is essential for a smooth stitching experience. Cut fabric slightly larger than the pattern‚ mark reference lines‚ and secure it tightly in a hoop to prevent shifting.
4.1 Cutting Fabric to Size
Cutting fabric to the correct size is a crucial step. Ensure the fabric is slightly larger than the pattern dimensions to fit comfortably in your hoop. This allows enough space for stitching without crowding or distortion‚ ensuring your design aligns properly and maintains its shape.
4.2 Marking Reference Lines
Marking reference lines on your fabric is essential for accurate stitching. Use a water-soluble pen to draw lines‚ starting from the center outward. This helps align your pattern and prevents mistakes. For larger projects‚ additional grid lines every 10 squares can enhance visibility. These lines will wash off after completion.
4.3 Securing Fabric in a Hoop
Place the fabric in the embroidery hoop‚ ensuring it is taut but not stretched. Tighten the hoop screws securely to hold the fabric in place. Adjust the hoop as needed to maintain even tension‚ which is crucial for consistent stitching. This setup ensures stability for your stitching process.
Basic Cross Stitch Techniques
Mastering cross stitch begins with the fundamental X-shaped stitch. Work in rows‚ starting from the center. Maintain even tension to ensure neat‚ consistent stitches for a professional finish.
5.1 The Cross Stitch: Step-by-Step
Start by bringing your needle up from the back at the bottom left of a stitch. Sew diagonally to the top right‚ completing the first half. Then‚ bring the needle back up below the first stitch and sew diagonally to the top left‚ forming the X shape. Keep tension even for consistency. This method ensures each stitch is uniform and neat‚ creating a clean finish on both sides of the fabric. Maintaining this technique is key for a professional-looking project. Always secure thread tails by stitching over them to avoid loose ends. This step-by-step approach helps beginners master the fundamental cross stitch with ease and confidence. By following these simple steps‚ you can achieve precise and beautiful stitching every time‚ setting a solid foundation for more complex designs in the future; With practice‚ this technique becomes second nature‚ allowing you to focus on the creative aspects of your cross stitching journey.
5.2 Half Stitches and Backstitches
A half stitch is a single diagonal line‚ often used for details or shading. Backstitches create straight lines‚ perfect for outlines or text. To sew a half stitch‚ bring the needle up at one corner and down at the opposite. For backstitches‚ insert the needle straight ahead‚ maintaining consistent length and tension for a polished look. These stitches add depth and precision to your design‚ allowing for intricate details and clear definitions. They are essential for completing patterns that require more than just cross stitches‚ ensuring your finished work is visually striking and professionally finished. Mastering these techniques will enhance your stitching repertoire and open up new creative possibilities. Always ensure even tension to maintain a neat and consistent appearance across your entire project. With practice‚ these stitches will become integral to your cross stitching skills‚ enabling you to tackle a wide variety of designs with confidence and precision.
5.3 Maintaining Even Tension
Maintaining even tension ensures your stitches lie flat and even. Too tight can pucker fabric; too loose may cause unevenness. Keep the hoop snug but not overly taut. Gently pull the thread while stitching‚ and avoid pulling too hard‚ as this can distort the fabric. After completing a stitch‚ guide the thread smoothly to the next to prevent slack. Consistent tension is key for a professional finish. Regularly check the back of your work to ensure threads aren’t bunching or sagging. By keeping tension steady‚ your cross stitch will look neat and uniform‚ enhancing the overall appearance of your project. This skill becomes easier with practice‚ helping you achieve a polished result every time. Even tension is crucial for both aesthetic appeal and the longevity of your stitched design. It prevents fabric distortion and ensures your artwork remains beautiful for years to come. Always monitor your stitching to maintain balance and harmony in your work. With attention to tension‚ your cross stitch projects will consistently impress and satisfy your creative vision.
Working with Colors
Working with colors in cross stitch involves organizing embroidery floss‚ switching hues seamlessly‚ and ensuring consistent application for a vibrant‚ professional finish.
6.1 Organizing Embroidery Floss
Organizing embroidery floss is key to efficient stitching; Use floss bobbins or containers to store strands‚ labeling each for easy identification. This system prevents tangles and ensures quick access to colors‚ keeping your workspace tidy and your project flowing smoothly.
6.2 Switching Colors Seamlessly
Switching colors in cross stitch involves securing the current thread and starting the new one. Weave the tail under previous stitches and trim excess. Bring the new color up at the next stitch‚ ensuring a smooth transition without visible ends‚ maintaining a clean and professional finish on the back of your work.
6.3 Tips for Consistent Color Application
For consistent color application‚ maintain even tension while stitching to prevent fabric distortion. Use the same number of floss strands as recommended. Keep fabric taut in a hoop and follow the pattern’s color sequence. This ensures uniformity and a professional finish in your counted cross stitch project.
Tips for Success
Start from the center‚ maintain even tension‚ and secure thread tails neatly. These practices ensure clean stitching‚ prevent fabric distortion‚ and lead to a polished finish.
7.1 Starting from the Center
Starting from the center of your pattern ensures balanced stitching and prevents running out of fabric. Locate the center point marked on your chart and begin stitching symmetrically outward. This approach helps maintain alignment and even tension‚ making the process smoother and more enjoyable. It also allows you to see progress early on.
7.2 Avoiding Common Mistakes
Common mistakes include miscounting stitches‚ uneven tension‚ and forgetting to secure thread tails. To avoid these‚ double-check your counts‚ maintain consistent tension‚ and secure tails properly. Using the wrong number of floss strands or ignoring pattern symbols can also lead to errors. Stay vigilant to ensure professional-looking results.
7.3 Managing Thread Tails
Properly managing thread tails is essential for neat stitching. Secure tails by weaving them under previous stitches or using small knots. Avoid long loose ends and trim excess thread. Keeping tails organized prevents tangling and ensures a clean finish on both sides of your fabric‚ enhancing the overall appearance of your project.
Finishing Touches
Finishing touches enhance your project’s presentation. Hand wash with mild soap‚ gently squeeze out water‚ and air dry. Iron on the reverse side for a crisp look. Display by framing‚ using a hoop‚ or incorporating into home decor for a professional finish.
8.1 Washing and Drying Your Project
Gently hand wash your finished project with mild soap. Avoid wringing or twisting to prevent damage. Lay flat on a towel‚ roll to absorb excess moisture‚ and air dry away from direct sunlight. This ensures your stitches remain even and fabric stays intact for lasting beauty.
8.2 Ironing Your Finished Stitch
To iron your finished project‚ place it face down on a heat-resistant surface. Use a low heat setting and gently iron the back of the fabric. Avoid direct heat on stitches to prevent damage. This step ensures a smooth‚ professional finish‚ ready for display or gifting.
8.3 Displaying Your Work
Once complete‚ your cross stitch can be framed or mounted on a wall. Consider using embroidery hoops or turning it into items like pillows or bookmarks. Creative displays enhance your home decor and showcase your craftsmanship‚ making your project a beautiful and lasting keepsake.

Creative Project Ideas
Transform cross stitch into thoughtful gifts‚ home decor‚ or unique accessories. Explore themed patterns like Baby Yoda or lemons for personalized touches. Create custom pieces for special occasions or support charities through stitching.
9.1 Turning Stitch into Gifts
Transform your stitching into heartfelt gifts‚ such as personalized bookmarks‚ keychains‚ or pincushions. Create custom designs for special occasions‚ like Baby Yoda for Star Wars fans or lemon patterns for summer themes. These unique‚ handcrafted items make thoughtful presents‚ offering a personal touch that reflects your creativity and effort. Perfect for expressing love and care through art.
9.2 Incorporating Stitch into Home Decor
Enhance your home with cross-stitched wall art‚ decorative pillows‚ or embroidered fabric covers. Use stitching to create personalized items like coasters‚ table runners‚ or framed patterns. These handmade touches add warmth and personality‚ turning your space into a reflection of your creativity and style with meaningful‚ handcrafted details.
9.3 Unique Uses for Cross Stitch
Explore creative ways to use cross stitch beyond traditional projects. Create personalized bookmarks‚ keychains‚ or pincushions. Stitch custom designs on fabric book covers‚ lunch box bags‚ or small pouches. Even transform your work into coin purses or antique pocket mirrors‚ turning stitches into functional‚ one-of-a-kind items that showcase your creativity.
Troubleshooting Common Issues
Troubleshoot common issues like thread substitutions‚ stitching mistakes‚ and fabric fraying. Fix errors by weaving tails or using seam tears. Prevent fraying with tape or zigzag stitching for a polished finish.
10.1 Dealing with Floss Substitutions
When substituting embroidery floss‚ choose colors that closely match the original. Use brand conversion charts or apps for accurate swaps. Test the substitute on scrap fabric to ensure color consistency and texture. This ensures your design remains vibrant and cohesive‚ even with substitutions.
10.2 Fixing Stitching Mistakes
If you notice a mistake‚ gently remove the stitches without pulling too hard to avoid damaging the fabric. Use scissors or a seam ripper carefully. Re-stitch the area‚ ensuring even tension. Regularly checking your work can help catch errors early‚ saving time and frustration. Patience is key to perfecting your craft.
10.3 Preventing Fabric Fraying
To prevent fabric fraying‚ sew edges before starting or use masking tape. For Aida‚ remove excess threads and pre-fray. Alternatively‚ zigzag stitch or bind with tape. These methods ensure neatness and prevent unraveling‚ keeping your project professional and intact throughout the stitching process.

Creating Your Own Patterns
Create unique cross stitch designs using specialized software or graph paper. This allows personalization‚ bringing your ideas to life with customizable colors‚ symbols‚ and patterns for a truly original project.
11.1 Using Specialized Software
Specialized software enables you to create custom cross stitch patterns digitally. Design unique motifs‚ assign colors‚ and generate charts. This method streamlines the process‚ allowing precise control over details and ensuring your vision is accurately translated into a stitchable design for personalized projects.
11.2 Charting Designs on Graph Paper
Charting designs on graph paper allows you to manually create patterns. Each square represents a stitch‚ and symbols denote colors. Start with simple designs for clarity. Use a ruler for precision and test your pattern with a small stitch sample to ensure accuracy before committing to larger projects.
11.3 Personalizing Your Projects
Personalizing your cross stitch projects allows you to add unique touches. Use custom patterns‚ names‚ dates‚ or symbols to create meaningful designs. Incorporate personalized colors or themes to match your style or occasion‚ making each piece truly special and reflective of your creativity or commemorate events with bespoke stitching elements.