
celestron astromaster 114 user manual
The Celestron AstroMaster 114 is a Newtonian reflector telescope designed for beginner astronomers‚ offering excellent value and ease of use for exploring the night sky․
This manual guides assembly‚ operation‚ and maintenance‚ ensuring optimal viewing experiences with its 114mm aperture and 900mm focal length․
What’s in the Box?
Upon opening your Celestron AstroMaster 114 package‚ carefully verify all components are present․ You should find the telescope optical tube assembly‚ an equatorial mount‚ a tripod with accessory tray‚ and two eyepieces – typically a 10mm and a 20mm․
Additionally‚ the box contains a finderscope to aid in locating celestial objects‚ a Barlow lens to increase magnification‚ and the necessary mounting hardware․ Check for the instruction manual‚ which provides detailed assembly and operational guidance․ A software CD-ROM with astronomy software may also be included for planetarium simulations and object identification․
Inspect each part for any shipping damage before proceeding with assembly․ Retain the original packaging for potential future transport or warranty claims․ A complete inventory ensures a smooth setup process and a rewarding observing experience․

Understanding the Components
The Celestron AstroMaster 114 consists of several key components․ The optical tube houses the primary and secondary mirrors‚ gathering and focusing light․ The equatorial mount allows for tracking celestial objects as Earth rotates‚ crucial for extended observation․ Its axes represent Right Ascension and Declination․
The tripod provides a stable base‚ while the accessory tray offers convenient storage for eyepieces and the Barlow lens․ Eyepieces determine magnification; lower numbers yield higher power․ The finderscope assists in aiming the telescope․

The Barlow lens effectively doubles or triples magnification when used with an eyepiece․ Familiarizing yourself with each part’s function is essential before assembly‚ ensuring a successful and enjoyable astronomical journey․
Assembly Instructions
Carefully unpack all components and refer to this guide for step-by-step assembly․ Proper construction ensures stability and optimal performance for celestial viewing․
Attaching the Tripod Legs
Begin by laying out the tripod head on a flat‚ protected surface to prevent scratches․ Take each tripod leg and align the mounting holes with the corresponding studs on the tripod head․ Secure each leg using the provided bolts and washers‚ tightening them firmly but not excessively – avoid over-tightening‚ which could damage the threads․
Ensure all three legs are attached securely before proceeding․ Once attached‚ extend the legs to your desired height‚ locking them into place using the leg locks․ Adjust the leg locks to achieve a stable and level platform for the telescope․ It’s crucial to have a stable base for accurate observations․
Finally‚ double-check that all bolts are tightened and the legs are locked before mounting the equatorial mount․
Mounting the Equatorial Mount
Carefully lift the equatorial mount and align its base with the tripod head․ Locate the mounting holes and secure the mount using the large central bolt and any accompanying washers․ Tighten this bolt firmly to ensure a stable connection‚ preventing wobbling during observations․
Next‚ attach the pier extension (if applicable) to the tripod‚ securing it with the locking bolt․ Then‚ remove the pier head from the extension by loosening the three locking screws․ Position the equatorial mount onto the pier head and tighten the screws to firmly secure it․
Double-check all connections to guarantee the mount is securely fastened to the tripod before proceeding with telescope installation․
Installing the Telescope Tube
Locate the tube mounting rings on the equatorial mount․ Gently loosen the knobs or screws on these rings to create enough space to slide the telescope tube into place․ Carefully position the telescope tube within the rings‚ ensuring it’s centered and balanced․
Once positioned‚ tighten the knobs or screws on the mounting rings‚ but avoid over-tightening‚ as this could damage the tube․ The telescope should be held securely‚ but still allow for slight adjustments․
Verify the tube is firmly attached and doesn’t shift when gently nudged․ Proper installation is crucial for stable viewing and accurate tracking of celestial objects․ Ensure the dovetail plate is fully seated within the mount․

Understanding the Equatorial Mount
The equatorial mount compensates for Earth’s rotation‚ enabling smooth tracking of celestial objects with adjustments to right ascension and declination axes․
Right Ascension and Declination
Right Ascension (RA) and Declination (Dec) are the two coordinates used to pinpoint objects in the night sky‚ similar to latitude and longitude on Earth․ RA is measured in hours‚ minutes‚ and seconds eastward along the celestial equator‚ while Dec is measured in degrees‚ arcminutes‚ and arcseconds north or south of the celestial equator․
On your AstroMaster 114’s equatorial mount‚ the RA axis is typically controlled by the slow-motion control knob‚ allowing for precise adjustments to track stars as Earth rotates․ The Dec axis‚ also controlled by a slow-motion knob‚ adjusts the telescope’s vertical position to locate objects with specific Declination coordinates․ Understanding these coordinates and how to manipulate the mount’s controls is crucial for locating and following celestial targets effectively․
Properly setting the mount to the correct RA and Dec coordinates for your desired object will greatly simplify the observing process․
Balancing the Telescope
Balancing your Celestron AstroMaster 114 on the equatorial mount is essential for smooth tracking and preventing strain on the gears․ Begin by loosening the RA and Dec clutches․ Ensure the telescope tube is securely attached․ Adjust the counterweight shaft along the RA axis until the telescope remains stationary in any position when the clutches are released․
Next‚ slide the telescope tube forward or backward within the mounting rings until it remains balanced in the Dec axis․ This means it won’t drift up or down on its own․ Tighten all locking knobs after achieving balance․
Proper balance minimizes friction‚ allowing the slow-motion controls to work effectively and providing a more stable viewing experience․ Regularly check balance‚ especially after changing eyepieces or adding accessories․
Using the Slow-Motion Controls
The slow-motion controls on your Celestron AstroMaster 114 allow for precise adjustments to track celestial objects as they move across the sky․ These controls manipulate the Right Ascension (RA) and Declination (Dec) axes․ Turning the RA control moves the telescope horizontally‚ while the Dec control adjusts it vertically․
Use gentle‚ small adjustments – larger movements can make it difficult to maintain the target in view․ Practice tracking a stationary object during the day to get a feel for the control sensitivity․ Remember to loosen the RA and Dec clutches before using the slow-motion controls‚ and re-tighten them afterward to lock the position․

Smooth‚ controlled movements are key to enjoyable observing sessions‚ especially at higher magnifications․
Optical System and Accessories
The AstroMaster 114 features a Newtonian optical design‚ including eyepieces‚ a finderscope‚ and a Barlow lens‚ enhancing viewing versatility and clarity․
Eyepieces: Selection and Use
Your Celestron AstroMaster 114 typically includes several eyepieces‚ each offering a different magnification․ Lower magnification eyepieces (higher focal length‚ like 25mm) provide a wider field of view‚ ideal for locating objects and observing larger celestial features like the Moon or bright nebulae․
Higher magnification eyepieces (shorter focal length‚ like 10mm) magnify the image‚ revealing finer details․ However‚ they also narrow the field of view and can make objects appear dimmer․ Start with the lowest magnification to find your target‚ then gradually increase magnification as seeing conditions allow;
To use an eyepiece‚ remove the dust cap from the focuser drawtube and insert the eyepiece․ Secure it with the set screw․ Slowly turn the focus knobs to achieve a sharp image․ Remember that atmospheric conditions significantly impact image quality‚ so patience is key!
Finderscope Alignment
Accurate finderscope alignment is crucial for easily locating objects with your Celestron AstroMaster 114․ During daytime‚ point the main telescope at a distant‚ easily identifiable object – a telephone pole or building works well․ Center this object in the telescope’s eyepiece using the slow-motion controls․
Now‚ without moving the telescope‚ look through the finderscope․ Use the adjustment screws on the finderscope bracket to adjust its aim until the same object is centered in the finderscope’s crosshairs․ This process ensures the finderscope and telescope are aligned․
Re-check alignment periodically‚ especially if the finderscope is bumped․ A properly aligned finderscope will significantly improve your observing experience‚ making it much easier to find faint celestial objects․
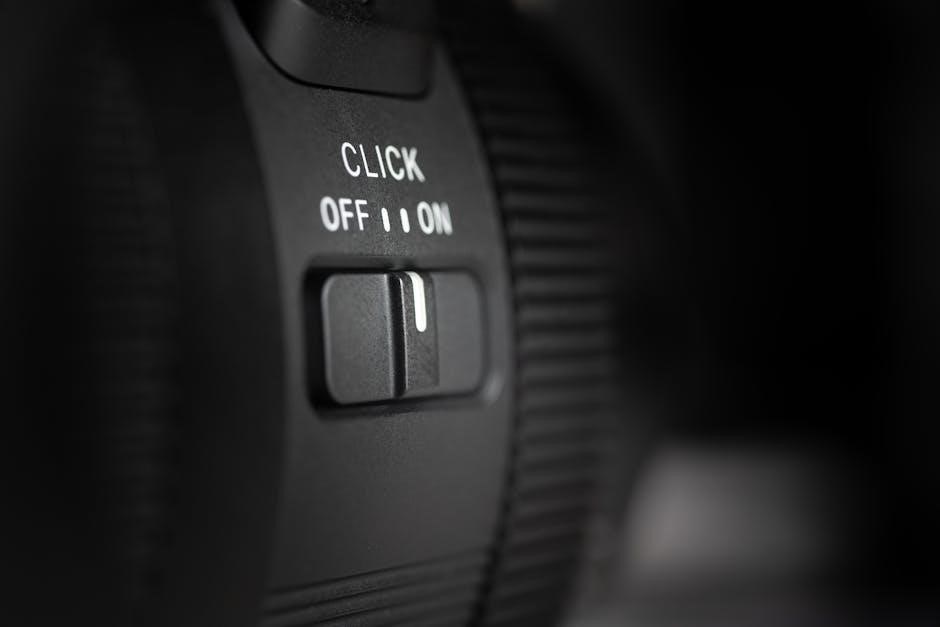
Barlow Lens Functionality
The Barlow lens‚ included with your Celestron AstroMaster 114‚ is a versatile accessory that effectively increases the magnification of your eyepieces․ It does this by inserting between the eyepiece and the telescope’s focuser‚ extending the light path․
Typically‚ a 2x Barlow lens doubles the magnification of any eyepiece used with it․ For example‚ a 25mm eyepiece becomes equivalent to a 12․5mm eyepiece․ This allows you to achieve higher magnifications without purchasing additional eyepieces․
To use the Barlow‚ simply insert it into the telescope’s focuser‚ then insert your eyepiece into the Barlow lens․ You may need to refocus the telescope after inserting the Barlow․ Remember that higher magnification reduces brightness and field of view․

First Light: Initial Setup and Observation
Prepare for your first observing session by aligning the finderscope‚ achieving polar alignment‚ and carefully focusing the telescope for clear‚ stunning views․
Polar Alignment Procedure
Achieving accurate polar alignment is crucial for tracking celestial objects smoothly with your equatorial mount․ Begin by leveling the tripod and ensuring the mount is securely attached․ Locate the polar alignment scope and remove its dust cap․
Sight through the scope and adjust the altitude and azimuth knobs on the mount until the reticle’s center point aligns with the North Celestial Pole (Polaris in the Northern Hemisphere)․ Fine-tune the alignment as needed‚ referencing a polar alignment chart for precise positioning․
This process compensates for Earth’s rotation‚ allowing the telescope to follow stars and planets with minimal manual adjustments․ Regular checks and minor corrections during observing sessions will maintain optimal tracking performance‚ enhancing your astronomical experience․
Focusing the Telescope
Achieving sharp focus is essential for clear astronomical viewing․ Begin by inserting a low-power eyepiece into the focuser․ Slowly turn the focus knobs – typically located on either side of the telescope tube – while observing a distant object‚ like a streetlight or building during daylight practice․
Continue adjusting the knobs until the image appears as crisp and detailed as possible․ Fine-tuning is often necessary‚ especially with varying atmospheric conditions․ Remember that focusing can change slightly throughout the night as temperature shifts occur․
For planetary observation‚ higher magnification eyepieces require more precise focusing․ Practice makes perfect; patience and small adjustments will yield the best results‚ revealing stunning celestial details․
Choosing Your First Target
Begin your astronomical journey with easy-to-locate targets․ The Moon is an excellent starting point‚ offering incredible detail even at low magnification․ Observe craters‚ mountains‚ and maria – the dark‚ smooth plains․ Jupiter and Saturn are also readily visible‚ showcasing cloud bands and Saturn’s magnificent rings‚ respectively․
Bright star clusters like the Pleiades (Seven Sisters) provide stunning views․ Locate them using star charts or astronomy apps․ Avoid attempting deep-sky objects initially‚ as they require darker skies and more experience․
Remember to allow your eyes to adjust to the darkness for at least 20-30 minutes for optimal viewing․ Start with low power and gradually increase magnification as your skills develop․

Maintenance and Care
Regular upkeep ensures longevity․ Clean optics gently‚ store the telescope in a dry place‚ and address minor issues promptly for continued enjoyment․
Cleaning the Optics
Maintaining clean optics is crucial for optimal viewing․ Dust and debris can significantly degrade image quality․ For removing dust‚ use a blower bulb – never compressed air‚ as it can damage the coatings;
If stubborn smudges remain‚ prepare a cleaning solution of isopropyl alcohol and distilled water (a 9:1 ratio is recommended)․ Apply a small amount to a lint-free microfiber cloth‚ not directly onto the lens․ Gently wipe in a circular motion‚ starting from the center and moving outwards․
Avoid excessive pressure․ For the telescope’s mirror‚ professional cleaning is advised if significant contamination occurs․ Regular‚ gentle dusting prevents buildup and maintains clear‚ bright images․ Always store lenses with protective caps when not in use․
Storing the Telescope
Proper storage protects your Celestron AstroMaster 114 from dust‚ moisture‚ and potential damage․ When not in use‚ disassemble the telescope and store components in a dry‚ climate-controlled environment‚ away from direct sunlight and extreme temperatures․
Keep the optical tube‚ mount‚ and tripod legs separated․ Use the original packaging or padded cases for protection during transport or long-term storage․ Ensure all dust covers are securely in place on the objective lens and eyepiece openings․
Avoid storing the telescope in damp basements or hot attics․ Periodic inspection for dust or mildew is recommended․ Proper storage extends the lifespan of your telescope and ensures it remains ready for enjoyable observing sessions․
Troubleshooting Common Issues
Difficulty focusing often stems from incorrect eyepiece insertion or atmospheric turbulence․ Ensure the eyepiece is fully seated and allow time for your eyes to adjust to the darkness․ Blurry images can also indicate a misaligned optical system; re-check collimation if familiar with the process․
If the telescope feels unstable‚ verify the tripod legs are securely extended and locked․ Problems with the equatorial mount may require re-balancing the telescope tube․ Difficulty locating objects is common for beginners; practice using star charts and the finderscope․
Always consult the full manual for detailed solutions․ If issues persist‚ contact Celestron customer support for assistance․ Avoid disassembling the telescope beyond basic maintenance procedures․

Advanced Observing Techniques
Explore deeper into astronomy with filters enhancing contrast‚ and astrophotography basics utilizing the AstroMaster 114’s capabilities for capturing celestial wonders․
Using Filters for Enhanced Viewing
Filters significantly improve observing details on the Moon‚ planets‚ and even certain deep-sky objects․ A lunar filter reduces glare‚ revealing subtle lunar features and enhancing contrast․ Planetary filters isolate specific wavelengths of light‚ bringing out cloud bands on Jupiter or the red spot‚ and details on Saturn’s rings․
Light pollution filters‚ while less effective with the 114mm aperture than larger telescopes‚ can still slightly improve contrast when observing nebulae and galaxies from urban areas․ These filters block specific wavelengths of light emitted by streetlights․
To use a filter‚ simply slide it into the eyepiece holder‚ ensuring a snug fit․ Experiment with different filters to see which ones provide the best views for your chosen target․ Remember to store filters carefully to avoid scratches and maintain optimal performance․
Astrophotography Basics with the AstroMaster 114
The AstroMaster 114 can capture basic astrophotos‚ though it’s limited by its equatorial mount and lack of tracking motor․ Smartphone astrophotography is a good starting point; use a phone adapter to attach your phone to the eyepiece and capture images of the Moon or bright planets․
For longer exposures‚ a dedicated astronomy camera and laptop are needed․ However‚ the manual tracking requires frequent adjustments․ Short exposures are crucial to avoid star trails․ Stacking multiple images using software like Registax can improve image quality․
Consider a Barlow lens to increase magnification for planetary imaging․ Patience and practice are key to successful astrophotography with this telescope․ Explore online resources for tutorials and software recommendations․
Resources for Further Learning
Expand your astronomical knowledge beyond this manual with numerous online and offline resources․ Celestron’s website (https://www․celestron․com/) offers support‚ FAQs‚ and additional product information․ Telescope․com (https://www․telescope․com/) provides articles‚ guides‚ and a community forum for telescope users․
Explore astronomy forums like Cloudy Nights (https://www․cloudynights․com/) to connect with experienced astronomers and ask questions․ YouTube channels dedicated to astronomy‚ such as AstroBackyard‚ offer visual tutorials and observing tips․
Local astronomy clubs are invaluable for hands-on learning and observing sessions․ Consider joining a club to share knowledge and experience the night sky with others․ Books on astronomy and stargazing will further enhance your understanding․